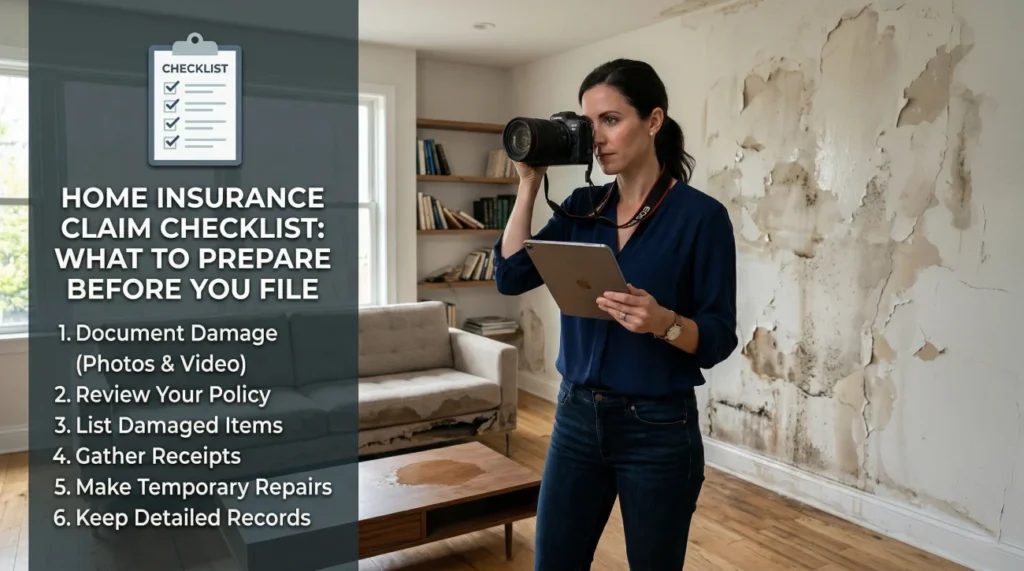
- Documenting damage before you clean up is the single most important step you can take to protect your settlement value.
- Insurance adjusters base their estimates on what they can physically see during their visit, making your pre-visit photos critical evidence.
- Having an independent contractor estimate ready provides a baseline to check if the insurance offer is missing necessary scope items.
The Reality of Claim Preparation
Most homeowners file an insurance claim under immense stress. You want to get the process moving, so you call your agent, answer a few basic questions, and wait for the adjuster to arrive. I have reviewed hundreds of claim files from the other side of the desk, and I can tell you that this approach almost always leads to a lower settlement.
The documents, photos, and records you gather before the insurance company even assigns an adjuster will dictate how your claim is handled. When you understand how the overall home insurance claim process works, you quickly realize that the adjuster is essentially building a puzzle. If you do not provide all the pieces upfront, their final picture of your loss will be incomplete.
This is not about tricking the system. It is about matching the precise documentation standards that insurance carriers require to release funds. Below is the exact home insurance claim checklist I recommend homeowners follow. I will walk you through exactly what you need to prepare, and more importantly, why each item directly affects the final number on your settlement check.
To keep from getting overwhelmed, divide this list into two phases. The Pre-Adjuster Visit Checklist (Items 1 through 4) is everything you must gather before the field adjuster inspects your home. The Ongoing Claim Checklist (Items 5 through 7) covers the documentation you must maintain until the final check clears.
1. Gather and Review Your Policy Documents
Before you make a formal statement to your insurance company, you need to know the rules of engagement. Your insurance policy is a contract, and the adjuster will follow it to the letter. You do not need a law degree to read it, but you do need to locate your Declarations Page.
The Declarations Page is usually the first page of your policy packet. It outlines your coverage limits, your deductible amount, and any specific endorsements you purchased. Having this ready helps you set realistic expectations for your payout.
I frequently see homeowners upset that their fence was only covered for a few thousand dollars after a storm. If they had checked their Declarations Page under ‘Other Structures,’ they would have seen the strict percentage limit applied to fences. Knowing your limits prevents you from fighting unwinnable battles and helps you focus your energy on the main dwelling scope.
When you have this document ready, you can immediately verify if the adjuster is working with the correct limits. If you are unsure what the specific terminology on that page means, I highly recommend reading a breakdown of what standard homeowners insurance actually covers to avoid surprises later.
2. Pre-Cleanup Damage Documentation
If you only remember one thing from this checklist, make it this: photograph and video every single affected area before you do any cleanup or make any temporary repairs. Take wide shots of the entire room, and then take close-up detail shots of the specific damage.
Why does this matter so much for your settlement? The insurance adjuster’s estimate is strictly limited to the damage they can visibly confirm during their physical inspection. Adjusters simply cannot compensate you for materials they cannot physically inspect. If you throw away soaked carpet padding or remove a collapsed section of drywall before the adjuster arrives without photographic proof, that damage effectively no longer exists in their software. Every piece of undocumented debris you discard is essentially a line item deleted from your final payout.
Here is my recommended method for damage documentation:
- 📷 The Four-Corner Rule: Stand in every corner of the affected room and take a photo facing the center. This establishes the overall scale of the loss.
- 📷 The Water Line: If you have water damage, take close-ups of baseboards and drywall showing exactly how high the water wicked up the walls.
- 📷 The Video Walkthrough: Walk through the house recording video while narrating what you see. Mention smells, squishy floors, or dampness that a still photo cannot capture.
What If You Already Cleaned Up?
If you panicked and threw away damaged carpet or drywall before taking photos, do not give up. You must pivot to alternative evidence. Look for before-and-after photos on your phone, pull Google Street View images for exterior damage, or ask your emergency mitigation crew to provide a detailed written statement about the water depth when they arrived. It is a harder fight, but alternative documentation is better than nothing.
3. Pre-Loss Documentation and Inventory
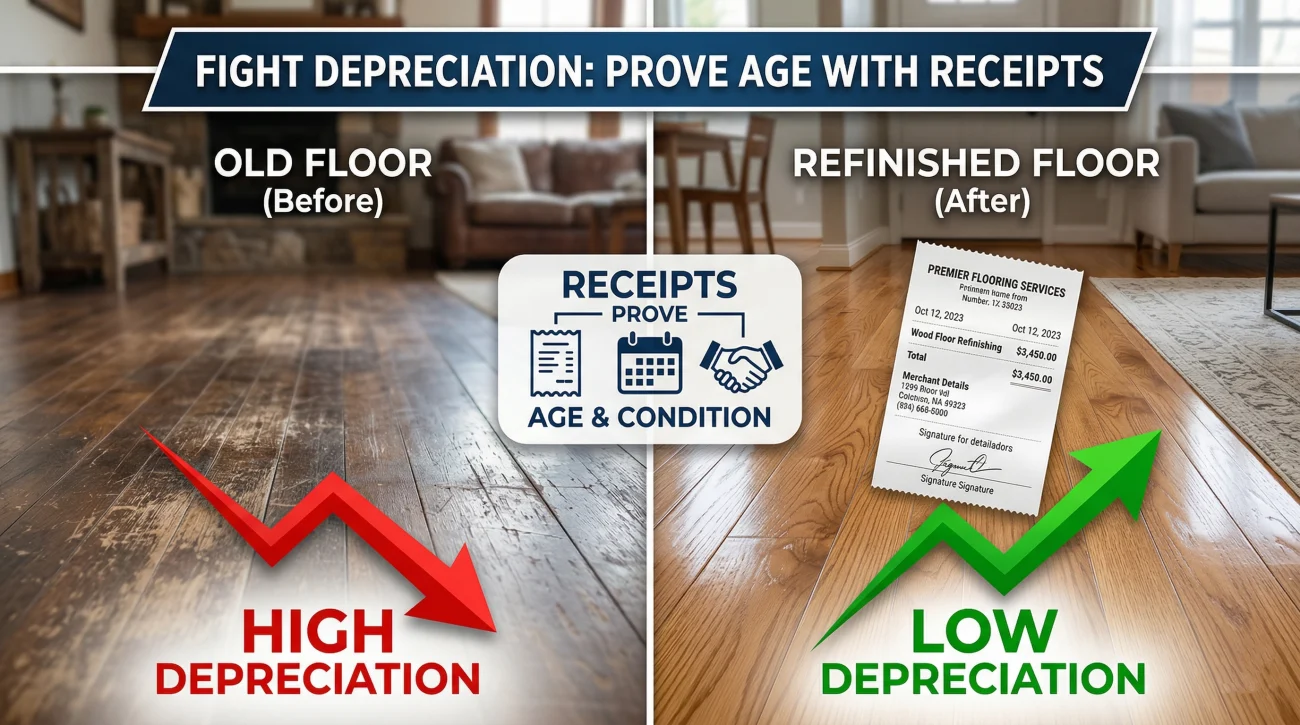
One of the most frustrating parts of a property claim is dealing with depreciation. When your insurance company issues your first check, they usually apply a depreciation holdback based on the age and condition of your damaged property. To fight unfair depreciation, you need pre-loss documentation.
This includes your home inventory, receipts for major appliance purchases, records of recent renovations, and even casual family photos taken inside the house before the damage occurred.
Telling the adjuster your hardwood floors were in “great condition” and accepting a 50 percent depreciation hit because the house is 20 years old.
Showing a receipt proving the floors were refinished just two years ago, forcing the adjuster to lower the depreciation rate and increase your initial payout.
The reason this is crucial: If you cannot prove the age or condition of an item, the adjuster will use a standard depreciation table. These tables are generally not in your favor. Providing receipts proves exact age, which limits how much money the insurer can hold back. If you are missing receipts entirely, there are still ways to establish value (see the FAQ at the bottom of this guide), but having the records is always the strongest position.
If you are confused about how this math works, it helps to understand the mechanics of how the actual cash value and replacement cost two-check system operates.
Bonus: Building a Pre-Loss Inventory Before Disaster Strikes
If you are reading this before you have a claim, you have a massive advantage. Spend 15 minutes today doing an “annual walkaround video.” Walk through your house recording video, opening closets, and narrating what you see. Alternatively, use free inventory apps to log major appliances with their serial numbers. Having this file saved in the cloud completely eliminates the depreciation fight later.
4. Independent Contractor Estimates
You should aim to get at least one detailed estimate from an independent, local contractor before or immediately after the insurance adjuster visits your property. Do not wait for the insurance company to make their offer before you start looking for a contractor.
The gap between your contractor’s number and the adjuster’s scope document is the clearest indicator of whether you are being underpaid. As I explained in the breakdown of how the claim process works, adjusters build their estimates using standardized software like Xactimate. Local contractors, however, bid based on real-world labor shortages, actual material costs in your zip code, and the true difficulty of access.
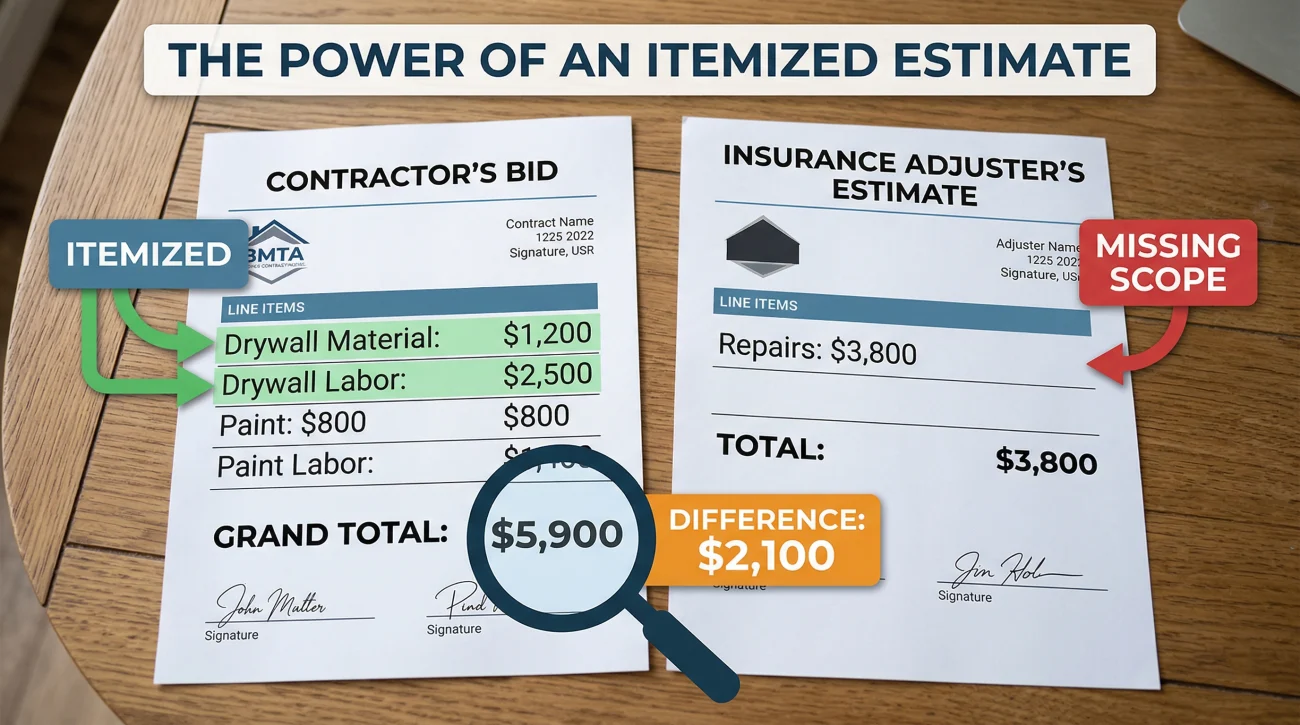
🗝️ Key Point: Your contractor’s estimate must be highly itemized. A single piece of paper that says “Rebuild Kitchen: $35,000” is completely useless to an insurance adjuster. The estimate needs line items for drywall, paint, flooring, plumbing, and labor hours.
📌 Note: While getting an early estimate is critical, wait to sign any binding repair contracts until the insurance company formally acknowledges coverage. Some insurers may complicate the process if they feel a contractor interfered or altered the scene before their initial inspection.
When the adjuster hands you their estimate, lay it side-by-side with your contractor’s bid to spot exactly what was left out. Often, adjusters miss hidden damage like subfloor rot or required building code upgrades. Understanding why adjuster estimates are frequently lower than contractor bids will help you prepare for this negotiation phase.
5. The Written Incident Record
Before you call the claims department, sit down and write out a brief, factual, and chronological record of the event. Note the exact date, the approximate time you discovered the damage, what happened, and the sequence of events.
Here is the critical part: your initial account of the event becomes a permanent part of your claim file. Adjusters use this statement to determine if the cause of loss is a covered peril or an exclusion. If you ramble, guess, or use imprecise language, you might accidentally trigger a coverage exclusion.
💡 Pro Tip: Stick entirely to the facts you observed. Do not play detective. If you found water on the floor, say “I discovered water pooling on the kitchen floor at 3 PM.” Do not say “I think the pipe has been leaking behind the wall for months.”
Speculating about the cause of damage before a professional assesses it is one of the biggest mistakes homeowners make. A casual comment can lead to a “gradual damage” denial. Knowing exactly which phrases to avoid when speaking to your insurance adjuster will protect the integrity of your claim from day one.
6. Temporary Repair Receipts
Your insurance policy contains a clause requiring you to “mitigate further damage.” This means if your roof has a hole, you must throw a tarp over it. If a pipe bursts, you must shut off the water and call a water extraction crew to dry the floors. If you fail to do this, the insurance company can deny coverage for any secondary damage, like mold growth.
You need to create a dedicated folder for all temporary repair receipts. This includes the cost of the tarp, the invoice from the emergency plumber, rental costs for industrial fans, and even the cost of a hotel room if the house is uninhabitable.
| Type of Expense | What to Keep | Why it Matters |
|---|---|---|
| Emergency Mitigation | Plumber invoices, water extraction bills | Proves you fulfilled your duty to prevent secondary damage. |
| Materials | Hardware store receipts for tarps, plywood | Fully reimbursable under almost all standard policies. |
| Additional Living Expenses | Hotel folios, restaurant receipts | Claimable under your Loss of Use coverage if displaced. |
7. The Claim Communication Log
While keeping track of physical receipts protects your repair funds, tracking your conversations protects your legal timeline. From the moment you dial the claims hotline, you must treat the process like a business transaction. Start a communication log. Every time you speak to someone from the insurance company, write down the date, the time, the person’s name, their role, and a bulleted summary of what was discussed and promised.
This is crucial because claims are frequently transferred between different desk adjusters and field adjusters. Information gets lost. If an adjuster promises to send a check by Friday, and it does not arrive, your log allows you to hold them accountable.
Here is an example of a solid log entry format:
Time: 10:15 AM
Spoke with: John Doe (Field Adjuster)
Notes: John confirmed he received the contractor’s estimate. Stated he needs approval from his manager for the roof decking line item. Promised to call back by Thursday the 15th with an update.
If the claim starts to stall, this log becomes your best piece of evidence. Documented delay or unresponsiveness is highly relevant if you need to escalate the file to a supervisor. If you are wondering if your specific delay is normal, you should check the standard benchmarks for how much time a typical home insurance claim takes to process.
Signs Your Claim Preparation May Not Have Been Enough
Even if you followed every step of this checklist perfectly, the insurance company’s initial offer might still fall short. This happens because the adjuster’s job is to protect the insurer’s bottom line, which often results in a narrowly written scope of loss. You are likely facing a documentation gap if you notice any of these patterns:
- ⚠️ The settlement offer completely ignores secondary damage areas that you clearly photographed and reported.
- ⚠️ The adjuster’s scope document is missing entire rooms or categories of repair that your independent contractor flagged.
- ⚠️ Heavy depreciation was applied to your payout, significantly reducing your check, despite you providing proof of recent renovations.
- ⚠️ Your independent contractor’s estimate is substantially higher than the settlement offer, and the insurer refuses to bridge the gap.
- ⚠️ The adjuster claims a vital repair is an “elective upgrade” rather than a mandatory building code requirement.
Bridging the Gap Between Your Prep and Their Payout
Excellent preparation helps, but it does not guarantee the insurance adjuster captured everything correctly. When the scope document provided by the carrier simply does not match the reality of the damage you documented, you have hit a wall that DIY negotiation rarely fixes.
This is exactly where claims break down. You have the photos, you have the contractor’s bid, but the desk adjuster refuses to revise their Xactimate file. In these situations, bringing in a professional levels the playing field. A licensed public adjuster can take your prepared documentation, compare it against the insurer’s line-item estimate, and identify exactly which scope items were mischaracterized or left out.
If you are exhausted by the back-and-forth and worried about leaving thousands of dollars on the table, it is highly beneficial to explore the clear differences between the insurance company’s adjuster and a private adjuster working for you.
If you have your documents ready but the numbers are not adding up, you should consider getting a free scope review to see what was missed. You can learn more about having a professional public adjuster evaluate your claim documentation to ensure a fair outcome.
Final Thoughts on Claim Documentation
Filing a property claim is largely an exercise in data management. The homeowner who provides the clearest, most organized, and most comprehensive data almost always secures a better outcome than the homeowner who relies entirely on the insurance company’s inspection.
Treat your claim like a part-time job during the early stages. Organize your photos, secure your contractor bids, and keep your communication log updated daily. The effort you put into this checklist on day one will pay dividends when the final settlement check is issued.
If you have gathered all this information but are still debating whether the severity of the damage is worth the potential premium increase, you should review the criteria for deciding when it makes financial sense to file a home insurance claim before officially submitting your paperwork.
❓ FAQ
📝 What kind of photos should I take for a home insurance claim?
Take wide-angle photos of the entire room to show scale, followed by extreme close-ups of the specific damage. Ensure the lighting is good, and always take these photos before moving debris, cleaning up water, or making temporary repairs.
📝 What documents do I need to file a home insurance claim?
You will need your policy Declarations Page, pre-damage and post-damage photos, a written chronological account of the incident, receipts for any emergency repairs, and an itemized estimate from an independent local contractor.
📝 What is a Proof of Loss form and do I need one?
Your insurer may send you a formal Proof of Loss document to complete. This sworn statement is separate from your initial claim report and typically has a strict, policy-defined deadline for submission. Always ask your adjuster if and when a formal Proof of Loss is required.
⚠️ Do I have to give a recorded statement to my insurance adjuster?
You are generally required to cooperate with your insurer’s investigation, which sometimes includes formal statements. However, prepare your written timeline first and stick strictly to the facts you observed, without guessing or speculating about the underlying cause of the damage.
💡 Should I throw away damaged items before the adjuster arrives?
No. Never throw away damaged items, structural materials, or ruined furniture until the adjuster has physically inspected and documented them. If an item poses a severe health hazard, move it outside and cover it with a tarp, but do not dispose of it.
📝 Are temporary emergency repairs covered by my insurance?
Yes, standard policies generally cover reasonable costs incurred to protect your property from further damage, such as tarping a roof or extracting standing water. Keep all detailed receipts and invoices for reimbursement.
💡 Do I need a contractor’s estimate before I file my claim?
While you do not strictly need one to open the claim, having an independent contractor’s itemized estimate ready before or shortly after the adjuster visits provides a vital baseline to ensure the insurer’s offer is accurate.
💡 Is it better to communicate with my adjuster by phone or email?
Email is strongly preferred because it creates an automatic, date-stamped paper trail. If you must speak on the phone, immediately send a follow-up email summarizing the conversation and any promises made to ensure it enters the claim file.
💡 How can I prove the value of items if I don’t have receipts?
If receipts are lost, you can use credit card statements, owner’s manuals, warranty registrations, or family photos showing the item in your home. The goal is to provide enough evidence to prevent the adjuster from applying maximum default depreciation.
⚠️ What should I do if the adjuster’s checklist is missing damage I reported?
Do not sign a final release. Compare their estimate line-by-line with your contractor’s bid, submit your pre-cleanup photos proving the damage exists, and request a written explanation for the omitted scope. If they refuse, consider professional representation.
Understanding the whole process changes how you handle each stage.
- How a claim moves from filing to final payment
- What your policy actually covers and what it does not
- Which damage types get paid and which get excluded
- When filing a claim makes sense and when it works against you
- What to do after a denial and what your actual options are
- What a public adjuster does and when you actually need one
- When legal help is the move that changes the outcome
Low offers and scope disputes are common. These explain what to do.
- 5 patterns that signal your settlement is probably short
- Who the adjuster at your door actually works for
- Where water damage estimates most often fall short
- What fire damage settlements commonly leave out
- Why your roofer's number and the insurer's estimate do not match
- When a denial needs legal leverage, not just negotiation
- Four paths to fight a denial, including one most homeowners miss
Disclosure: I'm sharing my personal industry experience, but I am not an attorney or a licensed insurance agent. The guides on this site are for informational purposes to help you understand the operational side of property claims: process, organization, and documentation. Every policy is unique, so please defer to your specific policy language. For legal interpretation, contested situations, or binding advice, always consult a licensed professional in your jurisdiction.