- Insurance claims are settled based on the evidence you provide, not just what actually happened. The documentation you capture in the first few hours is the foundation of your entire claim.
- Never discard damaged materials (like a burst pipe or burnt appliance) before the insurance adjuster inspects them. Emergency stabilisation is expected, but destroying evidence will harm your payout.
- Contemporaneous written notes and third-party contractor assessments (like a plumber’s detailed report) are just as critical as photographs in preventing scope disputes.
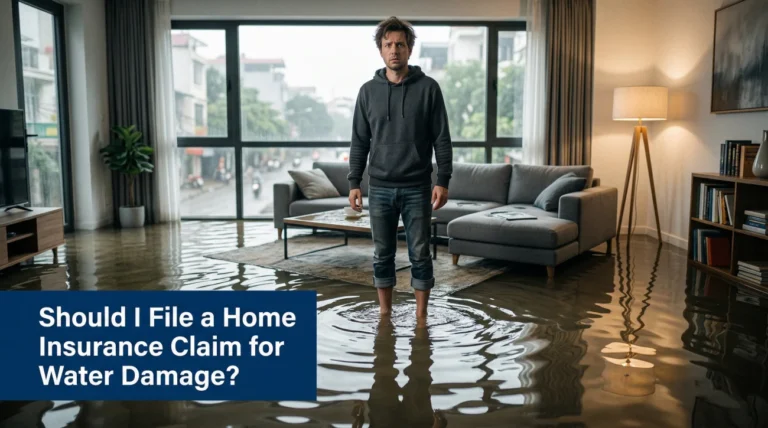
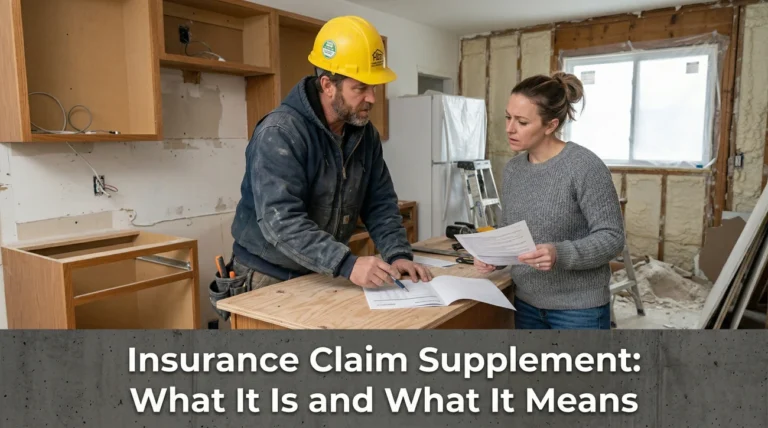
The Critical First Hour Dictates Your Claim
When sudden damage strikes your home, your immediate instinct is to clean it up, fix the problem, and protect your family. I completely understand that reaction. But over the years, sitting across from insurance adjusters and reviewing hundreds of claim files, I have seen this exact responsible instinct accidentally sabotage claims that should have been straightforward.
Insurance settlements are not based purely on the truth of what happened. They are based on what can be documented and proven. The difference between a full, fair settlement and a stressful, months long dispute is almost always determined in the first few hours after the damage occurs, long before you even pick up the phone to call your insurer.
I write this to help you pause. Before you start tearing out wet drywall or signing repair contracts, you need to capture the scene. Once cleanup begins, the physical evidence vanishes, and the adjuster who arrives days or weeks later will only see what you managed to preserve. In this guide, I will walk you through exactly how to document home damage the way an adjuster needs to see it, covering the visual proof, the written logs, and the specific third-party assessments that keep claims moving smoothly.
Why Documentation Trumps Reality in Insurance Claims
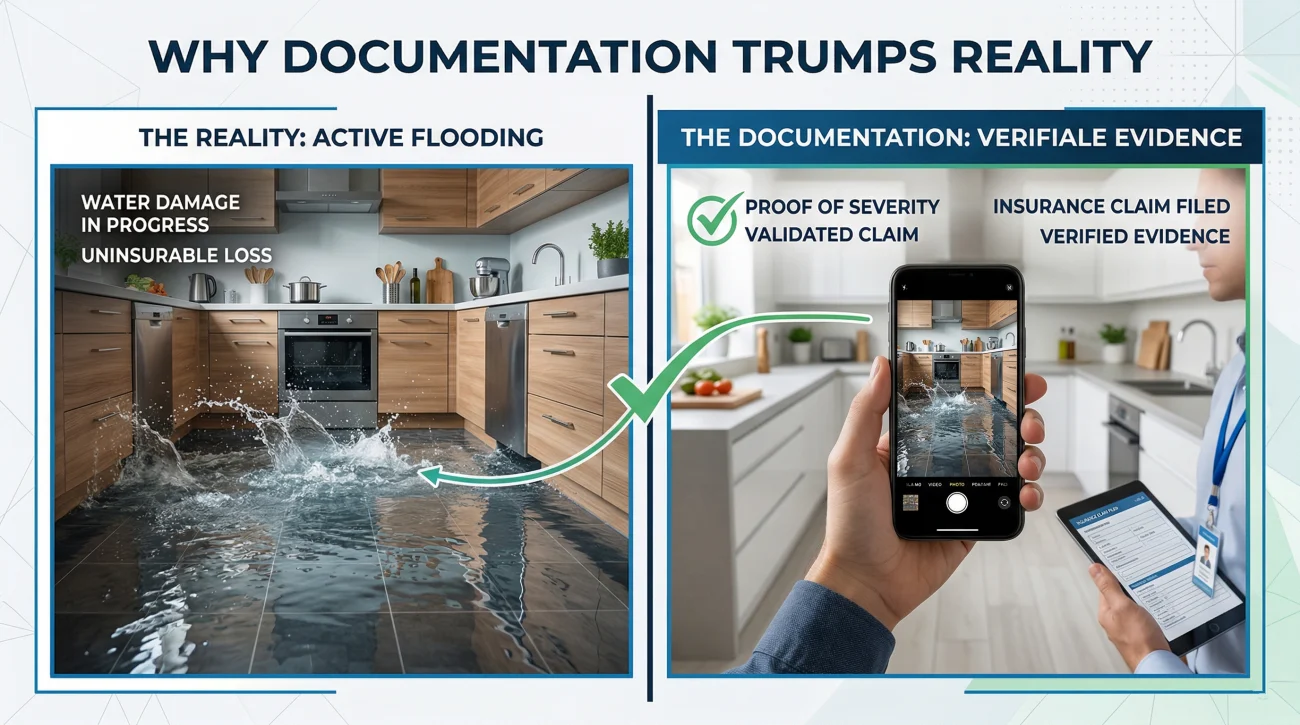
To understand why documentation is so crucial, you have to look at the process from the insurance company’s perspective. The desk adjuster assigned to your file was not there when the pipe burst at 2 AM. They did not see the two inches of standing water in your living room, and they did not smell the smoke from the kitchen fire.
By the time a field adjuster arrives at your property, the standing water has usually been extracted. The smoke has cleared. The emergency tarp is already on the roof. They are inspecting a sterilized version of the disaster. If you do not have rock-solid documentation of what the scene looked like at its worst, the insurer has to guess at the severity. And in the insurance industry, guesses rarely favour the homeowner.
In most water damage claims I review, the settlement gap usually comes from a homeowner doing the responsible thing early on. They shop vac the water and set up box fans immediately. When the adjuster arrives to a relatively dry room, they write an estimate for minor cosmetic repairs, completely missing the fact that the water sat for hours and wicked three feet up the drywall. Without photos of the standing water, proving the severity becomes an uphill battle.
Your goal is to build an undeniable timeline and visual record. You want to make it impossible for anyone reviewing your file to dispute the cause, the extent, or the immediate severity of the damage.
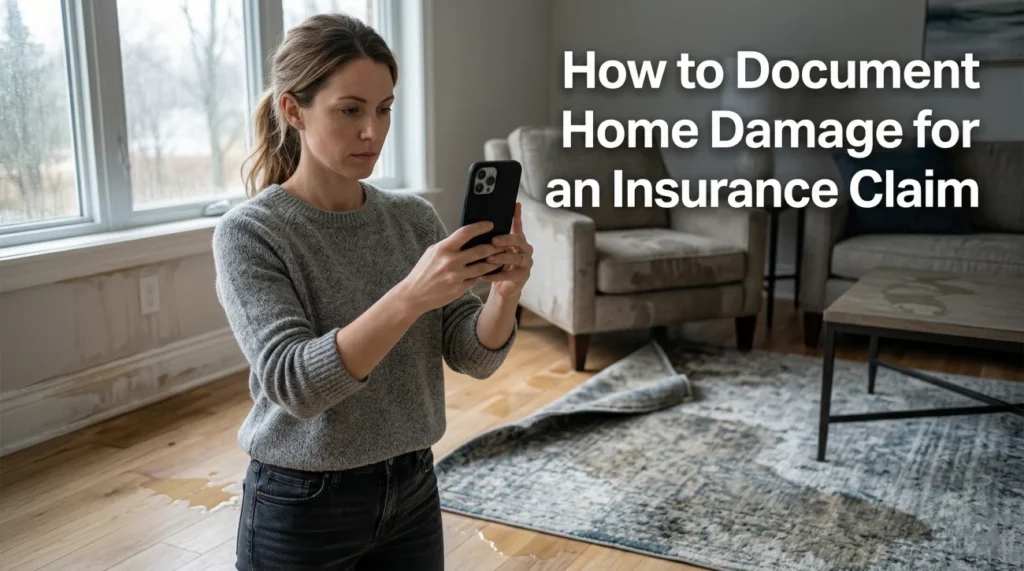
Visual Evidence: How to Photograph and Video Like a Pro
Everyone knows they need to take photos, but very few homeowners take the right kinds of photos. Taking a dozen blurry, extreme close-ups of a water stain tells the adjuster very little. You need to tell a visual story that establishes context, location, and specific damage.
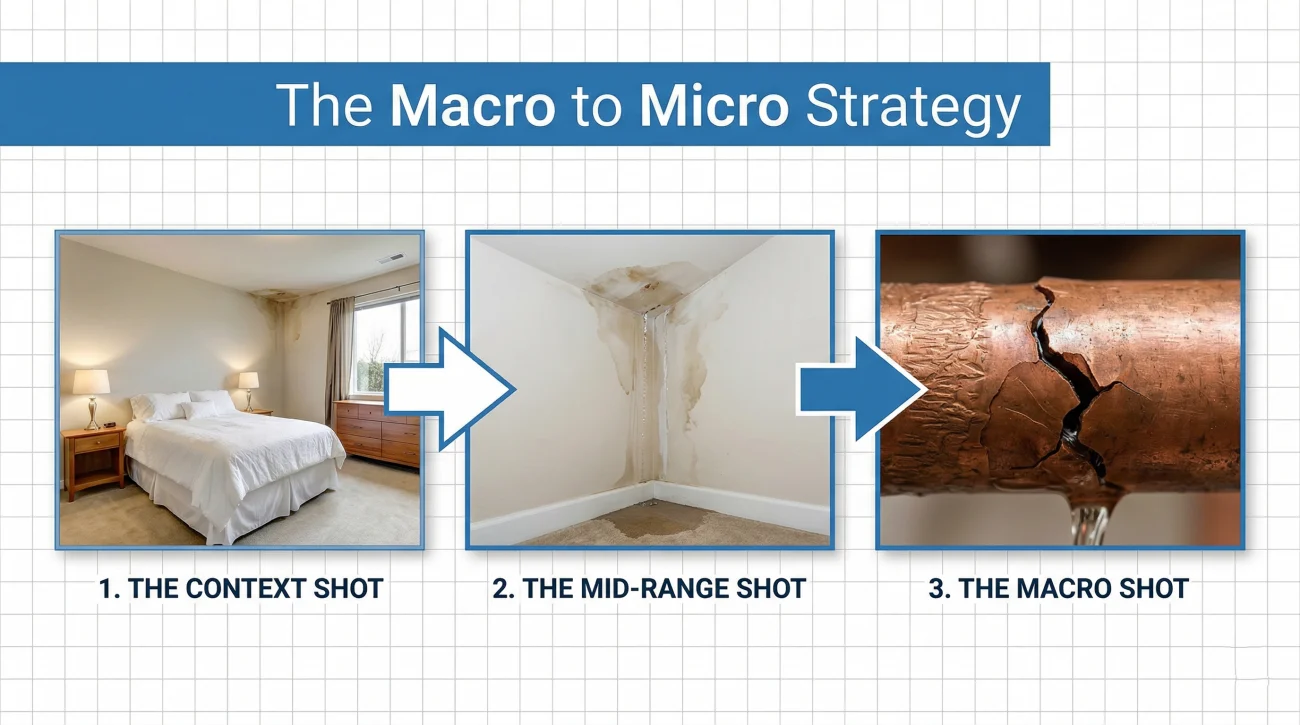
The Macro to Micro Strategy
When you start photographing, always move from the outside in. This provides the spatial context that desk adjusters need to orient themselves when looking at your file.
- 📷 The Context Shot: Stand at the doorway of the affected room and take wide shots of the entire space. Show where the damage is located relative to the rest of the room.
- 📷 The Mid-Range Shot: Move closer to the specific area of damage. If it is a ruined floor, show the transition from the damaged area to the undamaged area.
- 📷 The Macro Shot: Take clear, focused close-ups of the direct damage source. If a supply line under the sink ruptured, get a clear photo of the split in the metal or plastic.
The Video Walkthrough Technique
Photographs are mandatory, but a continuous video walkthrough is often your strongest piece of evidence. Start recording outside the home or at the front door. Walk through the property, keeping the camera steady, and narrate exactly what you are seeing, smelling, and feeling.
Sample Video Narration Script:
💡 Pro Tip: Do not just keep these files on your phone. Devices get dropped or damaged in the chaos of a disaster. Upload your photos and videos to a cloud drive or email them to yourself immediately. This not only protects the files but creates an independent digital timestamp proving exactly when the images were captured.
The Written Record: Contemporaneous Descriptions and Logs
This is the single most important step that 95 percent of homeowners miss. Photographs capture the visual aftermath, but a contemporaneous written description captures the exact timeline and conditions. “Contemporaneous” simply means written at the time the event occurred, rather than recalled from memory weeks later.
Human memory is flawed, especially during a crisis. If an adjuster asks you a month later exactly what time you discovered the leak and how far the water had spread, you might guess wrong. A written log removes the guesswork.
Keep a physical notebook or a dedicated digital note on your phone specifically for the claim. Use this basic formula for your first entry:
[Date & Time of Discovery] + [Exact Observation] + [Immediate Action Taken]
Sample Contemporaneous Log Entry:
The Communication Log
Documenting the physical damage is only half the battle. You must also document every single interaction you have with your insurance company. Every time you call your insurer, write down the date, the exact time, the name of the representative you spoke to, and a brief bulleted summary of what they told you. If an adjuster verbally approves emergency mitigation over the phone, your log of that conversation is your best defense if the company later tries to deny the mitigation invoice.
Leveraging Third-Party Proof: Contractor Written Assessments
Often, the first person to arrive at your home after damage occurs is not the insurance adjuster, but an emergency contractor. This might be a plumber stopping a leak, a fire department crew, or an emergency water mitigation team.
These professionals are independent third parties. Their written assessment of your property is pure gold for your claim file. However, a generic invoice is not enough. You must ask the contractor to document the exact cause and scope of what they observed before they fixed it.
Accepting a plumber’s invoice that simply says: “Replaced broken pipe under kitchen sink. Total: $450.”
Asking the plumber to write: “Responded to emergency call. Discovered sudden failure of braided steel supply line under kitchen sink. Observed severe water saturation extending from the sink cabinet into the surrounding hardwood floors and subfloor. Replaced supply line to stop leak.”
If your insurer later tries to argue that the leak was a slow, gradual maintenance issue rather than a sudden, covered event, that detailed plumber’s report serves as independent expert testimony supporting your timeline.
Documenting Personal Property Before You Move It
When personal belongings are destroyed, the immediate reaction is to throw them in garbage bags and get them out of the house. Do not do this until every single item has been documented in place.
The insurer will require a detailed contents inventory to reimburse you for personal property. Grouping items together in a photo and calling it “ruined clothes” will result in a heavily depreciated, minimal payout. You must itemize.
Take clear photos of the damaged items where they sit. Try to capture brand names, model numbers, and serial numbers if possible. If you do not remember the exact brand or model, do not guess. Write “Unknown brand, standard 4-slice toaster” and provide a replacement cost for a comparable middle-tier item. Adjusters prefer honest generalizations over inaccurate specifics that look like you are inflating the claim.
| Item Description (Be Specific) | Brand / Model | Approximate Age | Estimated Replacement Cost |
|---|---|---|---|
| Standard 4-Slice Toaster | Unknown (Generic) | 3 Years | $45.00 |
| Winter Puffer Jacket (Men’s) | Columbia | 2 Years | $120.00 |
| 43-Inch Smart TV | Samsung (Basic Model) | 4 Years | $250.00 |
Supplement this list later with any digital receipts, credit card statements, or older family photos that prove you owned the items in question before the damage occurred.
Preserving the Scene: What NOT to Do Before the Adjuster Visits
Just as important as what you document is what you choose not to touch. In many standard policies, the insurer reserves the right to inspect the damaged property. If you destroy that property before they arrive, you jeopardize your coverage.
The “Do Not Discard” Rule
Never throw away the physical cause of the loss. If a plumbing valve failed, keep the broken valve. If a toaster short-circuited and caused a fire, do not throw the toaster in the dumpster. The insurance company may need to inspect these items to determine liability. Keep damaged items in a safe, dry place on your property until the adjuster explicitly tells you in writing that they can be discarded.
What If You Were Not Home?
If you return from a weekend trip to find your home flooded, your timeline is already broken. You do not have a “first hour” of the event. In this scenario, document the exact moment of discovery. Look for and photograph clues that indicate duration, such as deep mold growth or warped floorboards, and immediately secure a contractor assessment. The contractor’s report will be crucial in helping establish a likely timeframe for the adjuster.
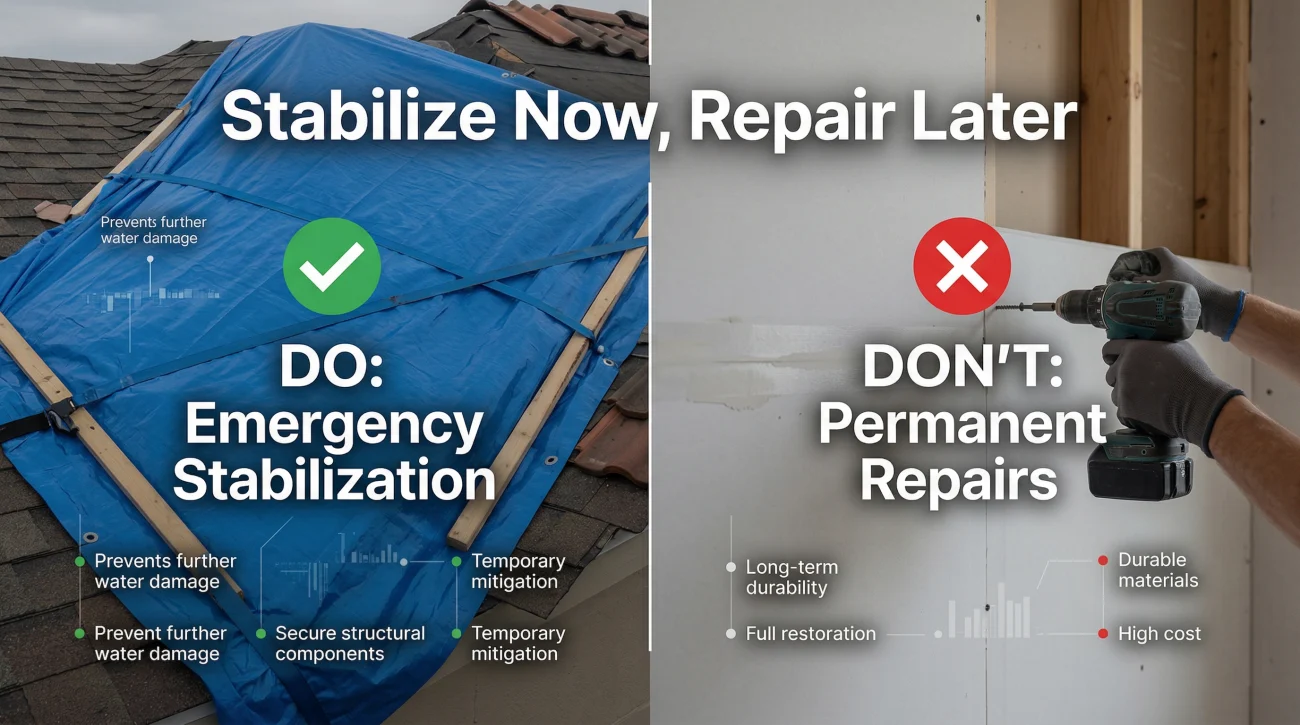
Emergency Stabilisation vs Permanent Repairs
You have a strict duty to mitigate damage. This means you must take reasonable steps to prevent the situation from getting worse. Tarping a roof, boarding a broken window, or having a mitigation company extract standing water are all necessary and expected emergency actions.
However, completing permanent repairs before the adjuster visits is a massive mistake. Do not install new drywall, lay down new flooring, or put on new roofing shingles before the inspection. If you do, the adjuster cannot verify the extent of the original damage.
⚠️ Warning: Always document the scene extensively before any mitigation workers begin tearing out materials. To understand exactly which costs are reimbursable and where the line is drawn, review the rules on completing emergency home repairs before the insurance claim is filed.
There are rare cases where life safety or severe weather dictates that you must complete repairs immediately, regardless of the adjuster’s schedule. Should you find yourself having already fixed the issue before the inspection, read our guide on whether you can still file a home insurance claim after repairs are done. Be aware that the burden of proof in these retroactive situations is exceptionally high.
Warning Signs Your Claim Is Headed for a Documentation Dispute
If you are currently in the middle of a claim and feeling frustrated by the insurer’s response, the root cause is almost always a gap in your initial documentation. You know your evidence has fallen short when the insurer starts using specific tactics to limit your payout.
- ⚠️ The “Wear and Tear” Argument: The adjuster focuses heavily on the age of your plumbing or roof rather than the sudden event that caused the damage. This happens when you lack a written contractor’s report confirming a sudden failure.
- ⚠️ The “Failure to Mitigate” Pushback: The insurer claims the mold grew or the floors warped because you did not act fast enough. Without a communication log proving you called them immediately or photos with timestamps showing when the water was extracted, this is hard to defend.
- ⚠️ The “Show Me the Receipt” Delay: The desk adjuster refuses to value your personal property without original purchase receipts. Insurers often use this tactic when your initial scene photos were too blurry or disorganized to clearly identify the quality of the ruined items.
- ⚠️ The Scope Reduction: The adjuster writes an estimate for patching a small section of drywall, completely ignoring the fact that moisture saturated well beyond the visible damage line. If the mitigation crew tore out the wet materials before the adjuster arrived and your photos are weak, the insurer will always assume the minimum possible damage.
These warning signs usually derail a claim before negotiations even begin. Understanding how these gaps fit into how the overall claim timeline unfolds is crucial to regaining control of your settlement.
Final Thoughts on Securing Your Evidence
The insurance claims process is inherently asymmetrical. The insurance company handles disasters every single day; you might do this once in a lifetime. They have a team of adjusters, engineers, and lawyers protecting their financial interests. Your documentation is the only shield you have to protect yours.
Documenting home damage is undeniably stressful. You are likely exhausted, overwhelmed, and just want your home back to normal. But taking an extra hour to thoroughly photograph the scene, narrate a video, and write down the facts of your loss is the highest-value work you can possibly do during a claim.
Before you commit to filing, ensure you have weighed the full filing decision framework to ensure the claim makes financial sense. If it does, your preserved evidence is your strongest leverage.
If you have already filed and your insurer is pushing back on your scope, claiming lack of evidence, or trying to minimize the damage based on what their adjuster saw days later, you do not have to fight that battle alone. Getting a second set of eyes on your documentation is often the fastest way to break a deadlock. You might consider having an independent professional assess how a public adjuster differs from an insurance adjuster, or explore if a free scope review from a licensed public adjuster makes sense to protect your payout.
❓ FAQ
📸 How many photos should I take for an insurance claim?
There is no strict limit, but you should take dozens rather than just a few. Capture wide context shots of the whole room, medium shots of the affected areas, and extreme close-ups of the direct cause of the damage before anything is moved or cleaned up.
🎥 Is video evidence better than photos for home claims?
Video is an excellent supplement to photos but should not replace them. A continuous video walkthrough where you narrate the date, time, and what you are seeing provides undeniable context that still photos sometimes lack.
📝 What is a contemporaneous written description?
It is a log or note written at the exact time you discovered the damage, detailing the date, time, weather conditions, and what you immediately observed. This real-time record is highly credible and prevents memory-based mistakes later in the claim process.
📱 What if I lose my phone with all the claim photos?
This is a common disaster within a disaster. You should immediately upload your claim photos and videos to a cloud service (like Google Drive or iCloud) or email them to yourself. This protects the files and creates an independent digital timestamp.
💧 What if I already cleaned up the water damage before taking pictures?
If the physical water is gone, your documentation burden shifts to the aftermath. Photograph water lines on baseboards, warped flooring, and saturated materials. You will also heavily rely on the written assessment from the emergency mitigation contractor who extracted the water.
🛠️ Can I start repairs before the insurance adjuster visits?
You can and must perform emergency stabilisation to prevent further damage (like tarping a roof). However, you should never begin permanent reconstruction (like installing new drywall) before the adjuster has documented the original damage.
🧾 Do I need original receipts for my personal property inventory?
While original receipts are ideal, they are not always strictly required. If you don’t have receipts, you can use credit card statements, owner’s manuals, or even older family photographs showing the item in your home to prove ownership.
📋 Should I make a home inventory before I have a claim?
Absolutely. Proactive documentation is the best protection. Walking through your undamaged home once a year and recording a video of your belongings makes the personal property phase of a future claim significantly easier to prove.
⏱️ Does it matter if my photos don’t have time stamps?
Time stamps are highly recommended because they establish a clear timeline. Most modern smartphones embed date and time metadata into the image file automatically, which adjusters can use to verify when the damage was recorded.
🔍 What if the adjuster disagrees with my documentation?
If the adjuster disputes your photos, logs, or contractor reports, politely ask for their explanation in writing. If the dispute significantly lowers your payout, consulting a public adjuster to review your evidence is often the next logical step.
Filing is just the beginning. These cover what the rest of it looks like.
- How a claim moves from filing to final payment
- What your policy actually covers and what it does not
- Which damage types get paid and which get excluded
- When filing a claim makes sense and when it works against you
- What to do after a denial and what your actual options are
- What a public adjuster does and when you actually need one
- When legal help is the move that changes the outcome
That gap is common and usually closeable. These explain how.
- 5 patterns that signal your settlement is probably short
- Who the adjuster at your door actually works for
- Where water damage estimates most often fall short
- What fire damage settlements commonly leave out
- Why your roofer's number and the insurer's estimate do not match
- When a denial needs legal leverage, not just negotiation
- Four paths to fight a denial, including one most homeowners miss
Disclosure: I'm sharing my personal industry experience, but I am not an attorney or a licensed insurance agent. The guides on this site are for informational purposes to help you understand the operational side of property claims: process, organization, and documentation. Every policy is unique, so please defer to your specific policy language. For legal interpretation, contested situations, or binding advice, always consult a licensed professional in your jurisdiction.